Creating a unique Wall Art is a simple process that is outlined below.
JUMP TO: Helpful Tips | Creating Wall Art Overview | Wall Art Editor Overview | Design Options | Edit Text | Edit Photos
Helpful Tips
- If the different Wall Art materials aren't showing, click the 'Personalize' button to be taken to the creation path where the materials will be displayed.
Creating Wall Art Overview
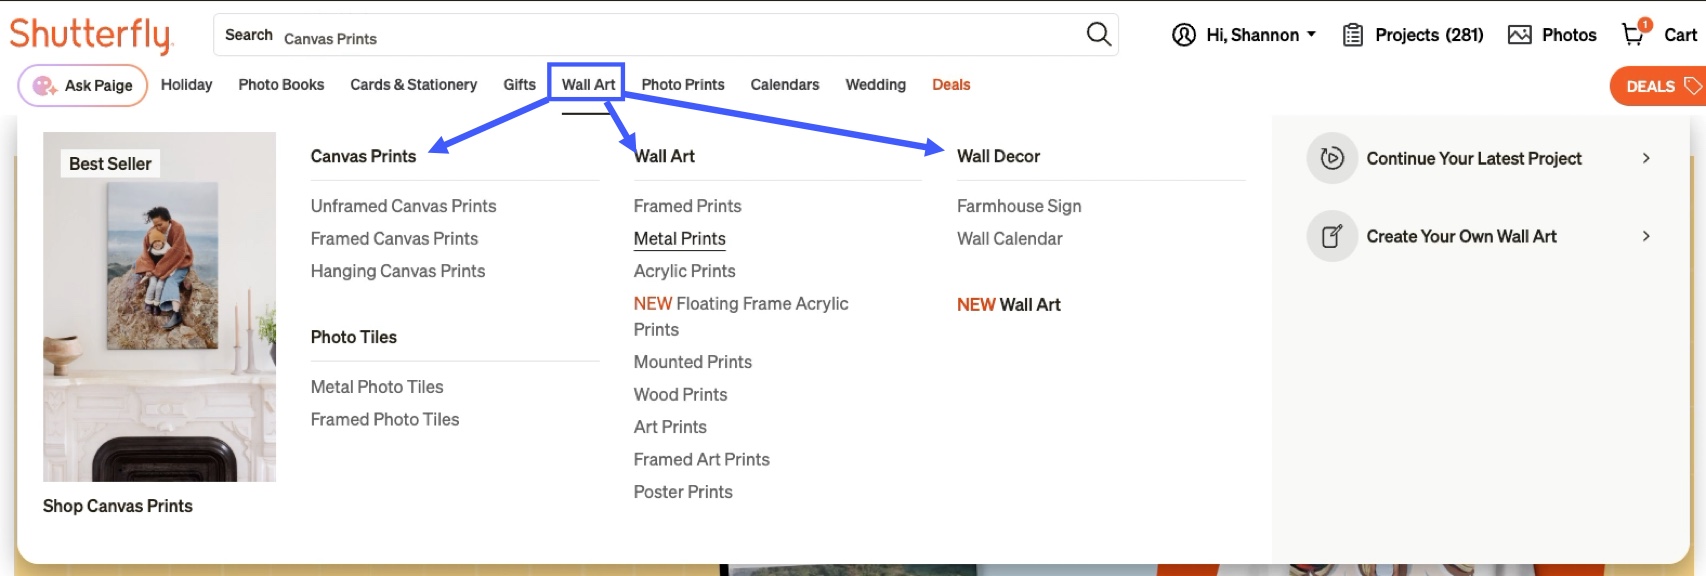
- Sign in to the Shutterfly account, Hover over 'Wall Art' on the navigation bar, and Click the desired type of Wall Art.
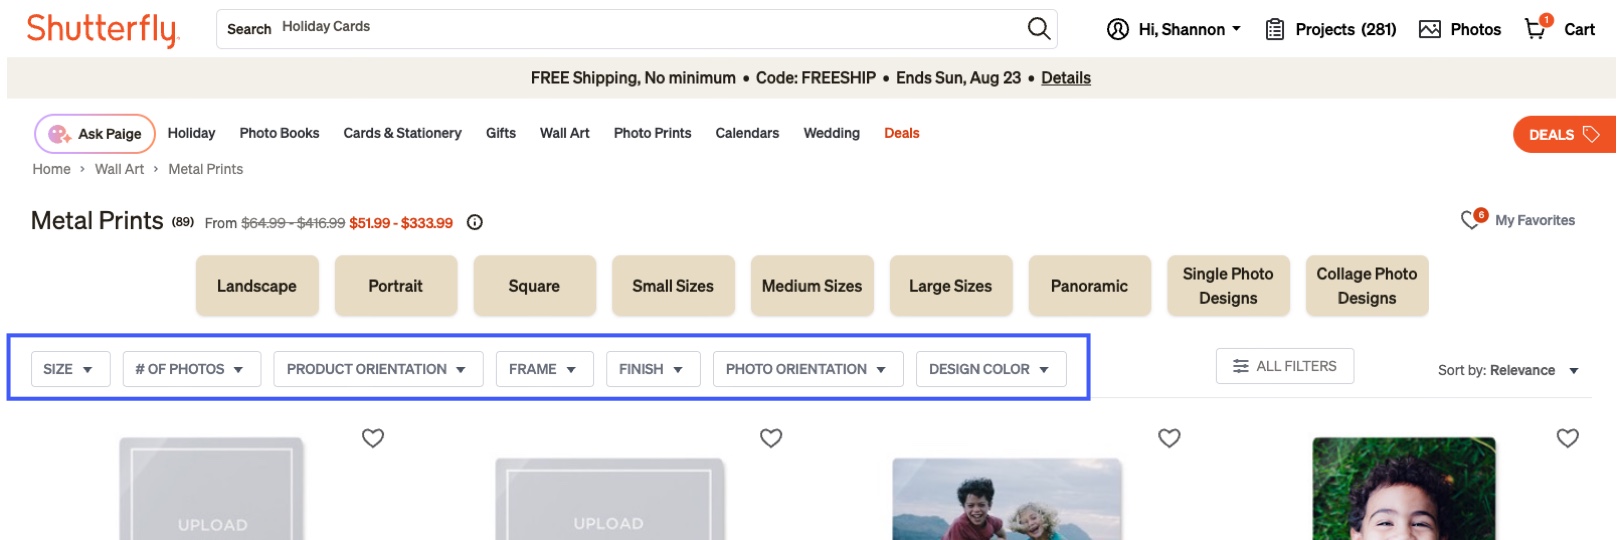
- Filter by the print size, number of photos, product orientation, frame type, finish, photo orientation, or design color on the toolbar and Select the desired design.
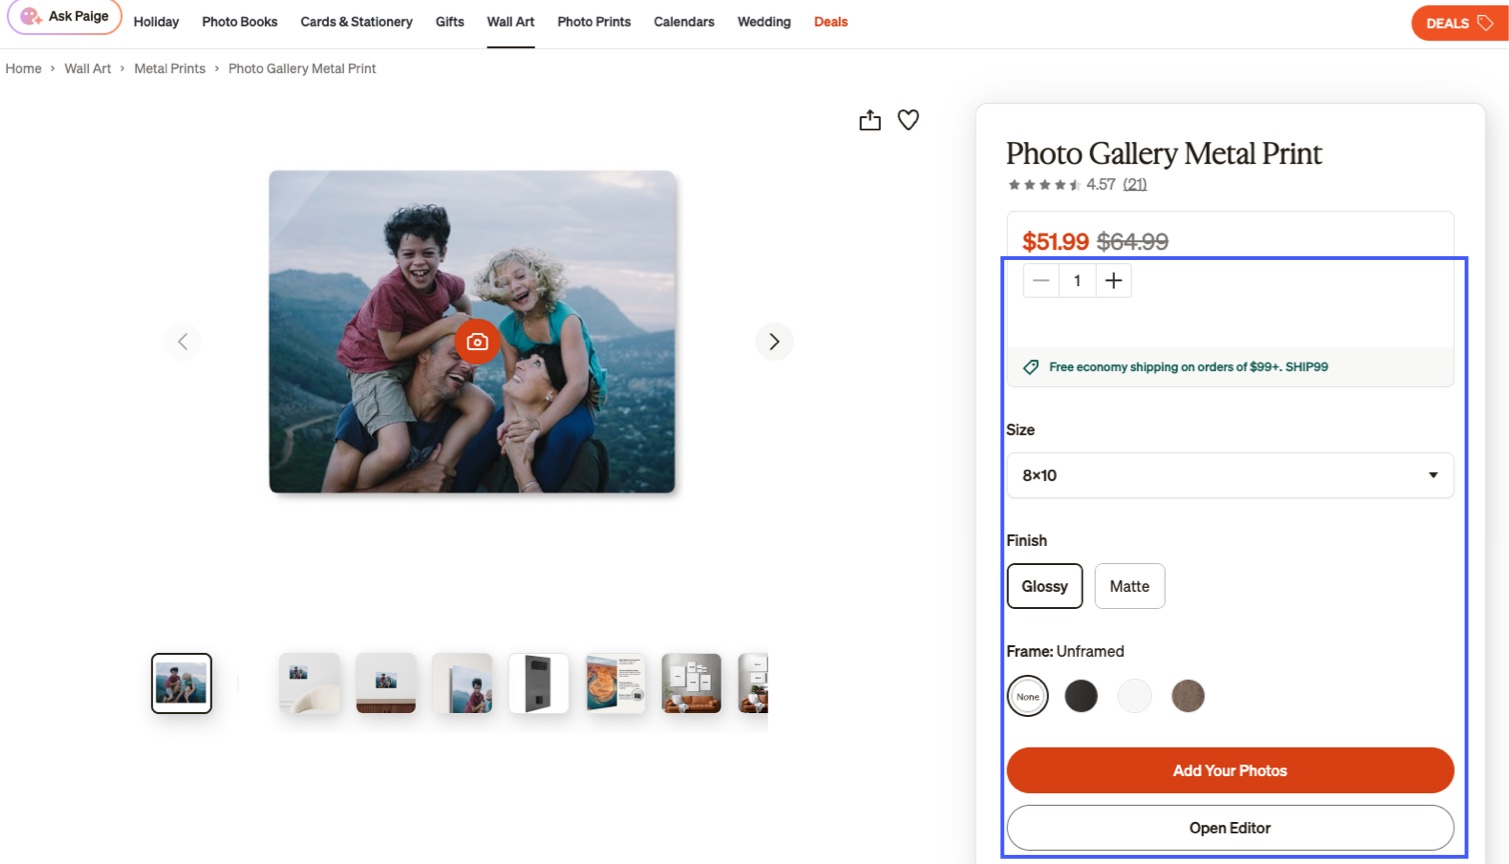
- Select the size, frame color (optional), and finish and Click 'Add Your Photo' (this option shows a preview with the photo selected) or 'Open Editor' (this provides the full editing experience.
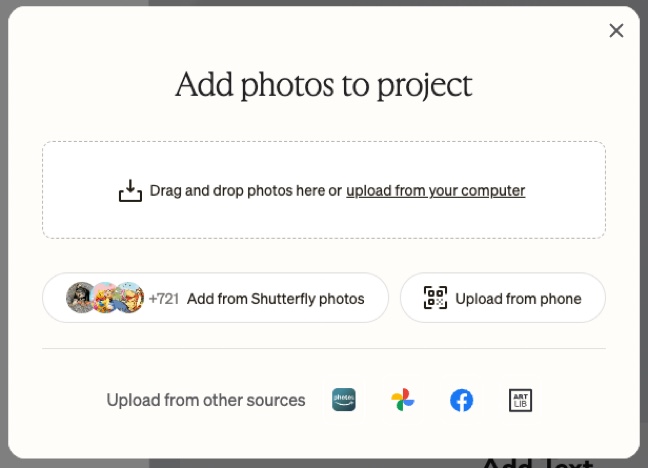
- Upload photos for the Wall Art using one of the following: Shutterfly Photos, Upload From Your Computer, Upload from Phone, Amazon Photos, Google Photos, Facebook, or Art Library.
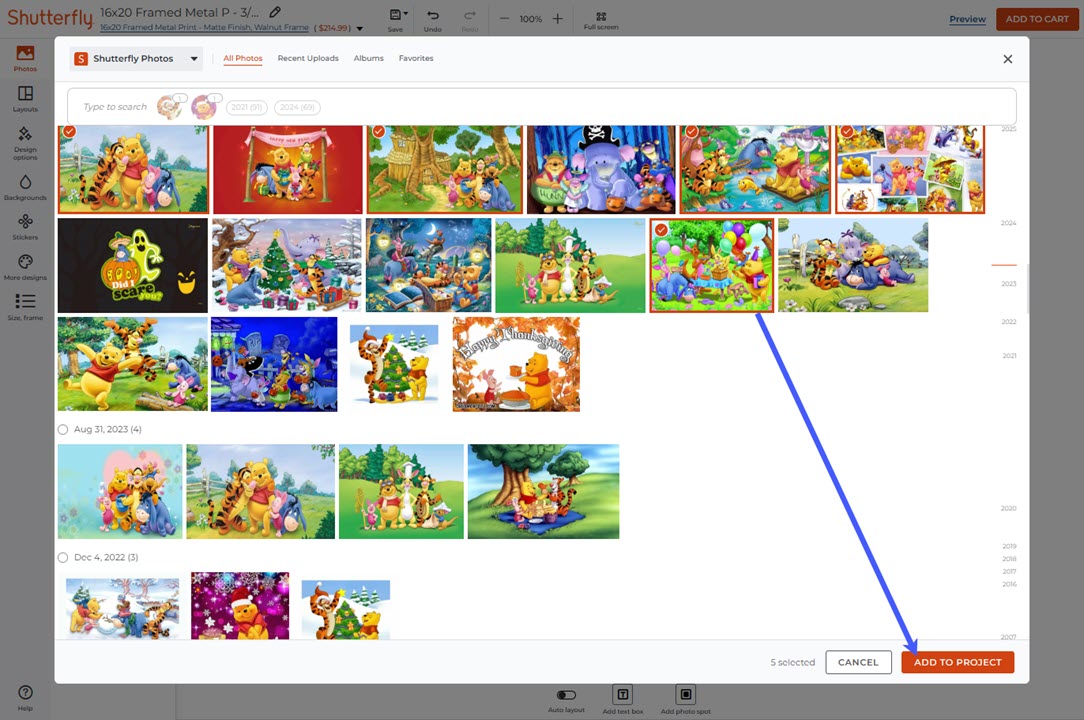
- Select photos and Click 'Add to Project'.
- Up to 60 photos can be added to the project and the number of photos that can be applied depends on the style or layout selected.
- Drag and Drop the photos where desired on the Wall Art.
- Click the text box and Enter desired text (if applicable).
- Change the font, size, color, background, alignment, or remove the text box if desired.
- If a text box is left blank, only the background will be printed in that space.
- See the Help Center Article Adding & Editing Text for more information.
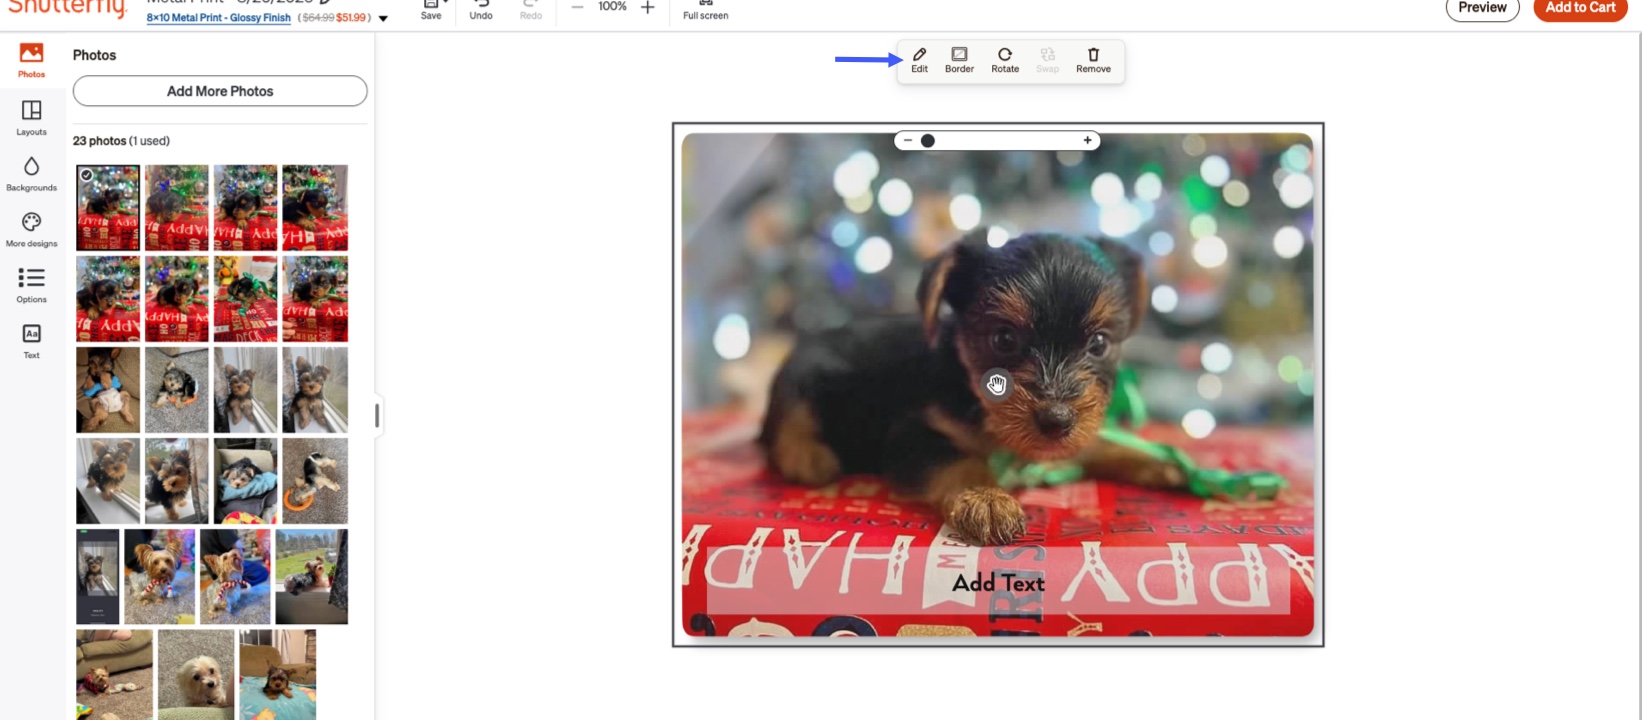
- Click on the image and Click 'Edit' once placed on Wall Art to edit the image.
- Click 'Preview' in the upper right corner when edits are complete to see how the Wall Art will print.
- This will show how a Canvas Print is stretched around the sides of the canvas if the Canvas Print is selected.
- Click 'Add to Cart' and Complete Checkout.
Wall Art Editor Overview
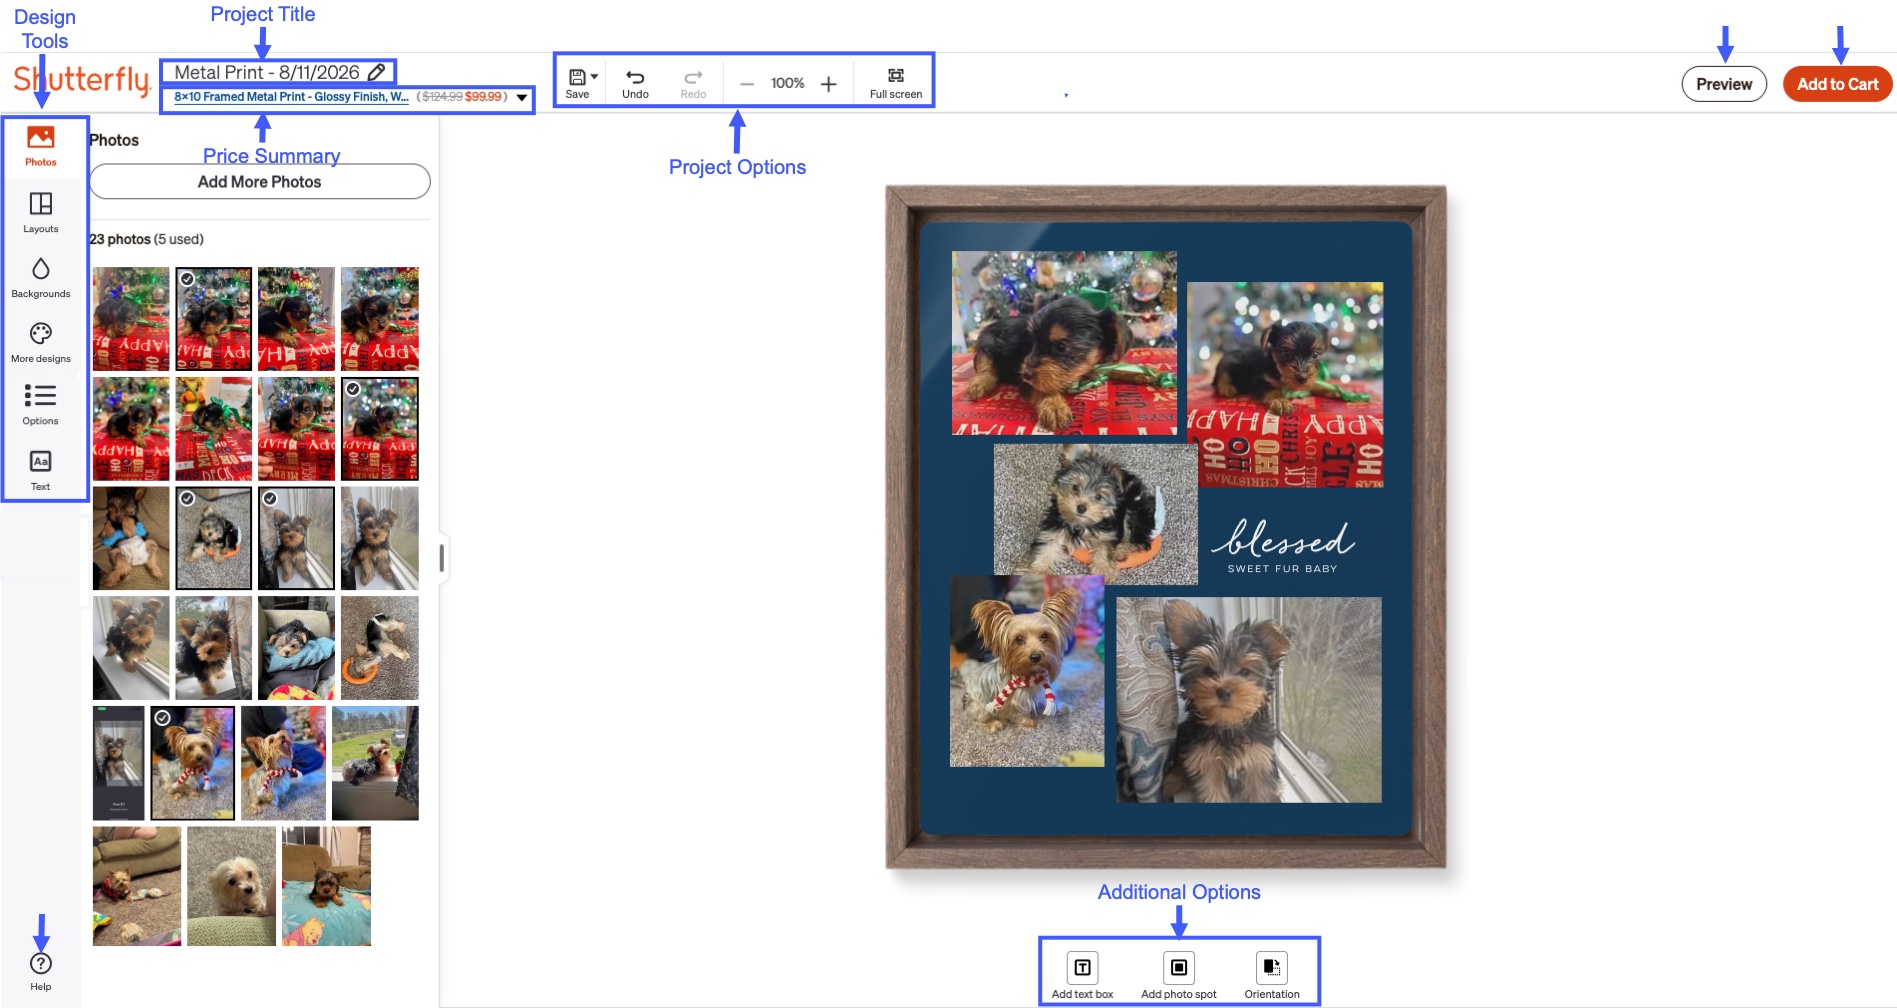
Quick Reference: Design Tools | Project Title | Price Summary | Project Options | Preview | Add to Cart | Help | Additional Options
Design Options
- Design Tools
- Photos
- Add More Photos
- Click at any time to add more photos to the project.
- Drag and Drop
- Drag and drop photos to the desired location on the Wall Art.
- Layouts
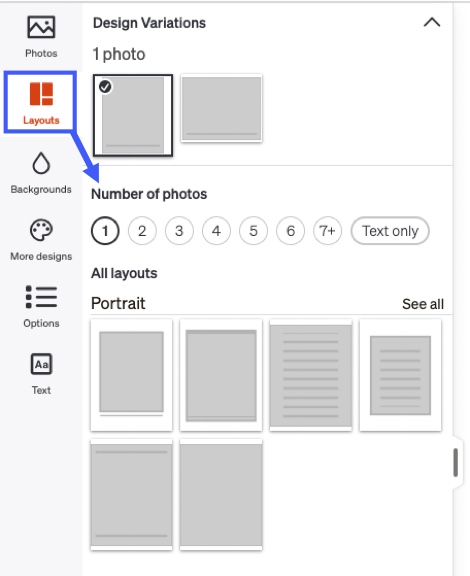
- Once photos are in the photo tray, the current layout can be used or changed.
- Select the desired layout.
- Layouts can be filtered by the number of photos.
-
-
- Backgrounds
- The Search Backgrounds box is used to search for a desired background.
- Favorites
- All favorited backgrounds will be displayed here.
- Solid Colors
- Click to be shown all solid color options to use as a background.
- All Backgrounds
- Click to be shown all available backgrounds.
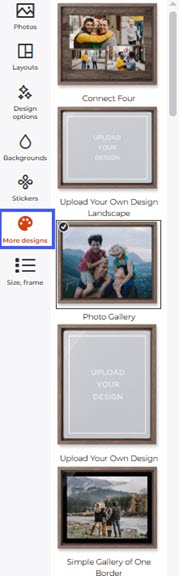
- More Designs
- Shows more designs to select from.
-
- Options
- Change the Size, Finish, or Frame Color.
- Text
- Project Title
- Click on the pencil icon to change the title of the Wall Art project.
- Price Summary
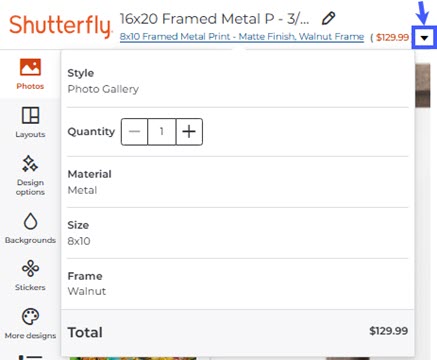
- Click the drop-down arrow beside the price of the Wall Art to see more information.
- Information includes the Style of the Wall Art, Quantity (this can be adjusted), Material, Size, Frame, and Total.
- Project Options
- Save
- Hover over the project to see when the project was last saved, and Click the dropdown beside the Save icon to Save or Save As.
- 'Save' will save any updates made to the current project without creating a copy of the project.
- 'Save As' will save a new copy of the project without making any changes to the current project.
- Undo
- Reverse a previous action.
- Redo
- Reapply a previous action.
- Zoom
- Zoom out to view the entire project or zoom in for a closer look.
- Full Screen
- Allows the project to be viewed in full screen.
- Press ESC or click 'Exit Full Screen' to return to normal viewing mode.
- Help
- Go to the Shutterfly Help Center to find more information on creating a Photo Book.
- Additional Options
-
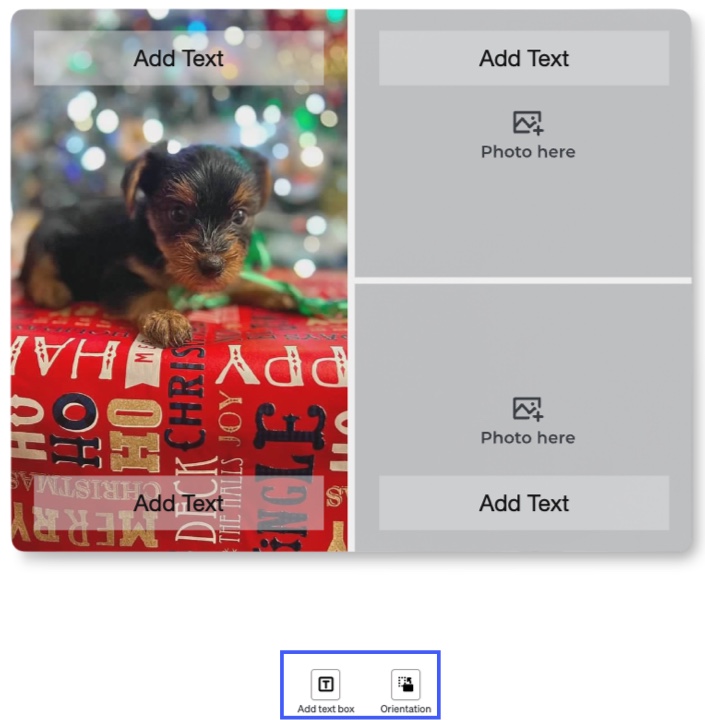
- Add Text Box
- Click to add a text box to the Wall Art.
- Change the font, size, color, background, align the text, set the style of the text, or remove the text box.
- Drag and drop the text box to move it anywhere on the page.
- A Blank text box containing 'Add Text' won't print on the Wall Art.
- Use the black squares on either side of the text box or the white squares to drag the text box to extend the box as desired.
- Orientation
- Choose either portrait or landscape for the orientation of the Wall Art.
- Preview
- Located in the upper right corner of the screen, the preview option shows how the Photo Book will print.
- Use the Preview feature to ensure the book looks as desired before ordering.
- Add to Cart
- Click 'Add to Cart' in the upper-right corner after reviewing the photo book for accuracy.
- Click 'Proceed to Cart,' Enter the quantity of photo books to order (per recipient), and Click 'Checkout.'
Edit Text
Edit Photos
- Edit
- Click on a photo and select 'Edit'.

-
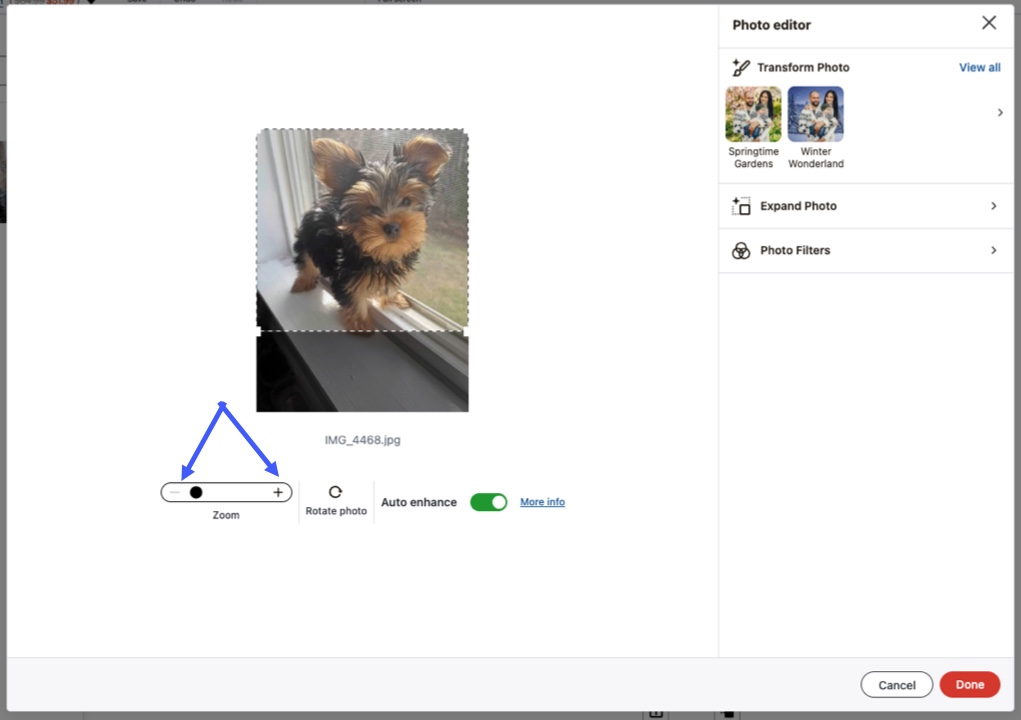
- Zoom
- Zoom in to or out of the photo by using the plus or minus signs.
-
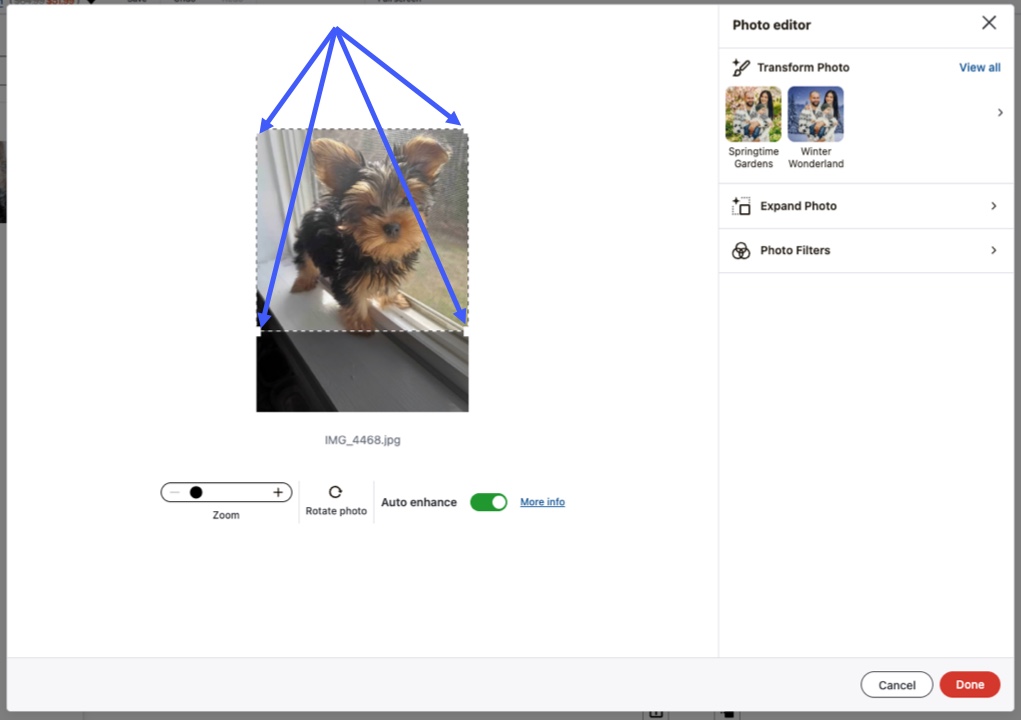
- Crop
- Crop photos by dragging one of the four corners to the desired area.
-
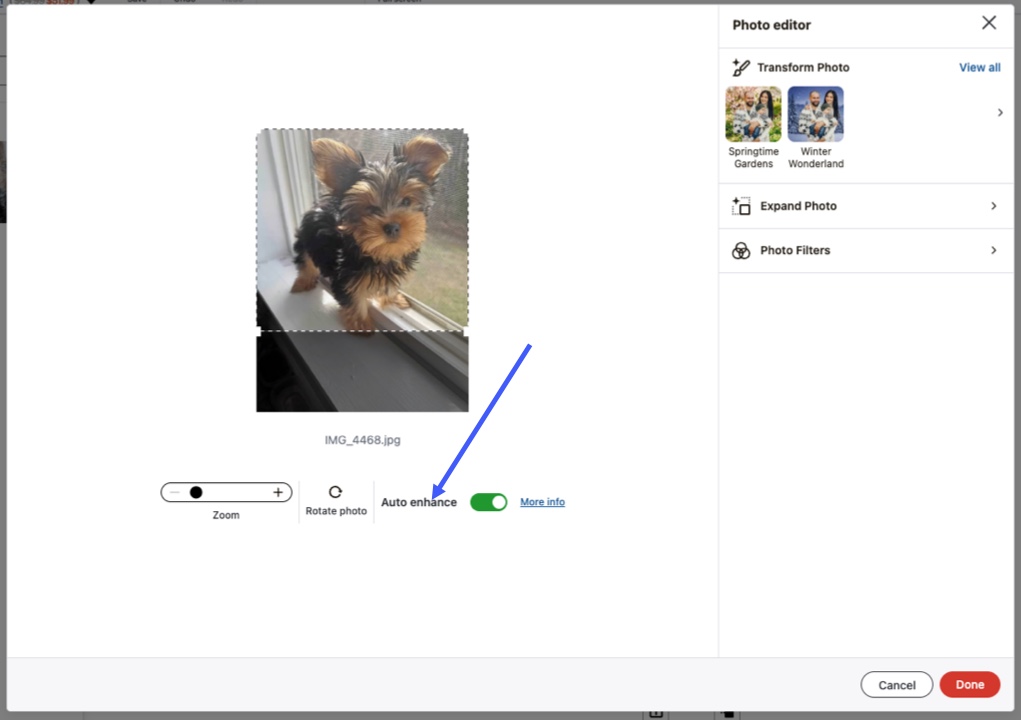
- Auto Enhance
- Auto Enhance helps improve print quality of "everyday" photos.
- If the photos were taken professionally, Shutterfly recommends turning off this feature.
-
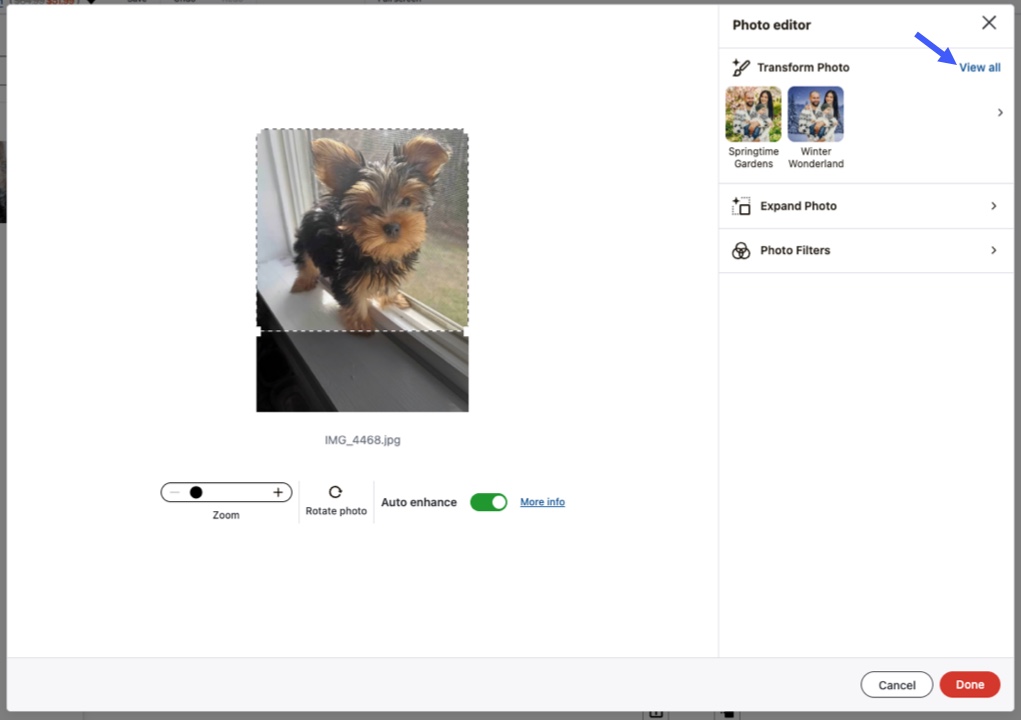
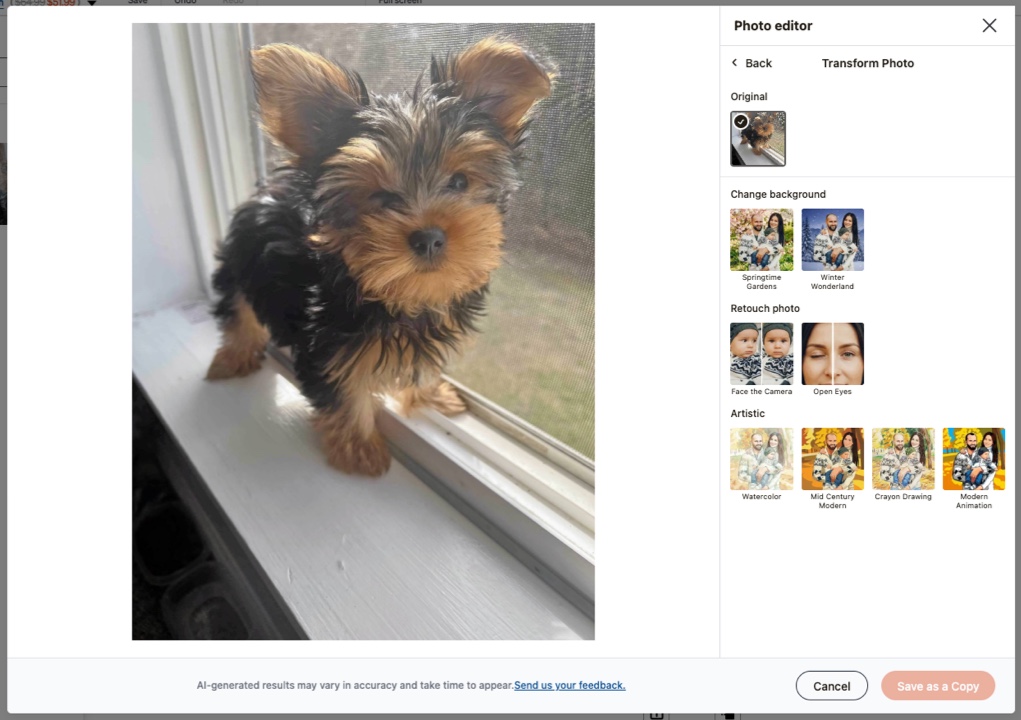
- Transform Photos with AI
- Click 'View all' to see all AI editing options.
-
-
- Select from Change Background, Retouch Photo, or Artistic to make AI adjustments to photos.
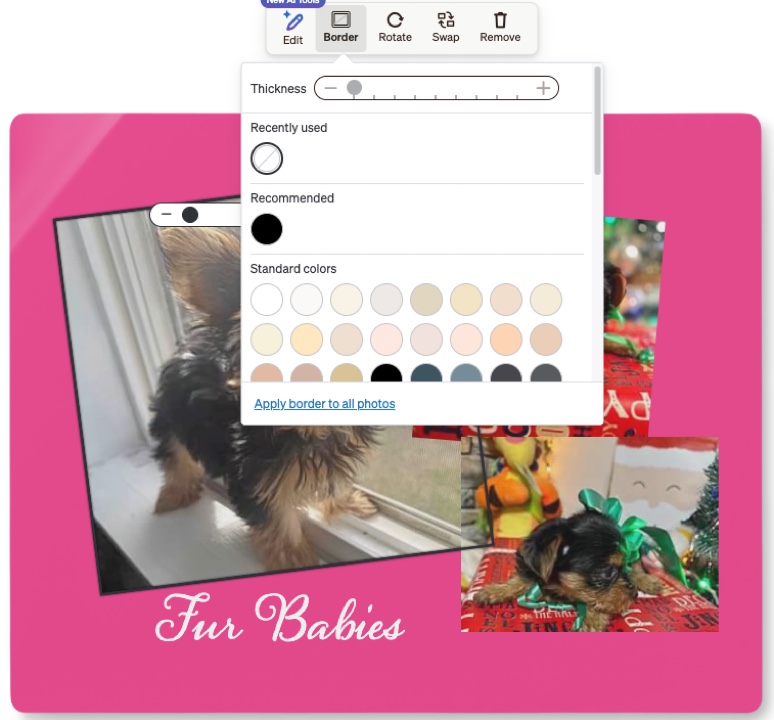
- Border
- Select the border thickness and color, as well as whether to apply the border to all photos.
- Rotate
- Click to rotate the image 90 degrees.
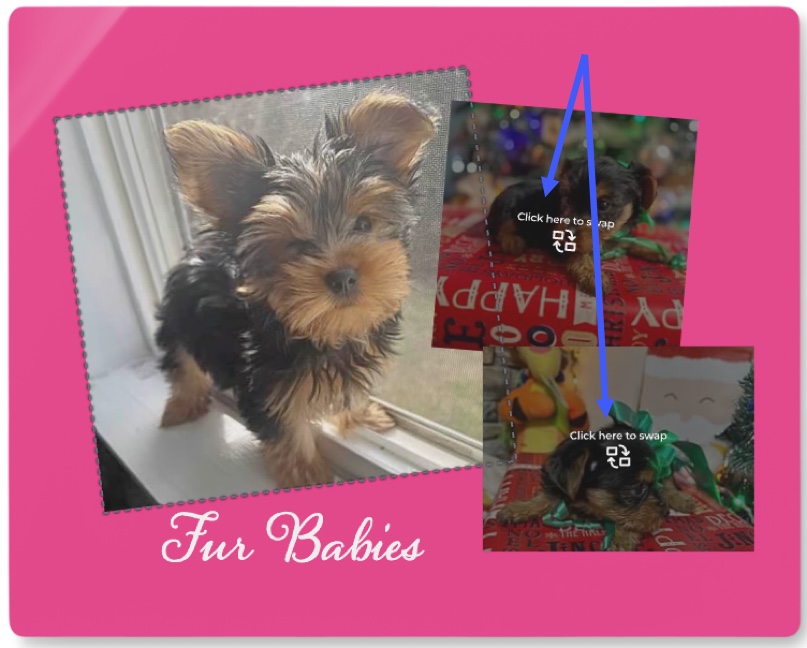
- Swap
- Click Swap and click on the desired image to swap with.
- Remove
- Removes the image from the Wall Art but doesn't remove the image from the project.


