Most Shutterfly projects include a text box, though some styles or designs may not offer this feature.
JUMP TO: Helpful Tips | Adding Text in Photo Books | Editing Text | Adding a Text Box | Spell Check | Text Error | Related Articles
Helpful Tips
- The text box appears online as a placeholder in project layouts, indicating where text can be entered, but the box itself (the gray area and the border) will not print.
- Entered text will be printed over the selected background design.
- If no text is entered, only the background design (not the text box) will be printed in that area.
- Ensure the text color is visible against the background color.
- Click on the text box and begin typing to enter text.
- To edit a text box that has already been placed double-click on the text box and begin typing.
- To copy and paste text, highlight the text, right-click and select 'Copy', then click in the Shutterfly text box, right-click, and select 'Paste'.
Adding Text in Photo Books
- Click 'Add Text Box' within the Photo Book creation path.
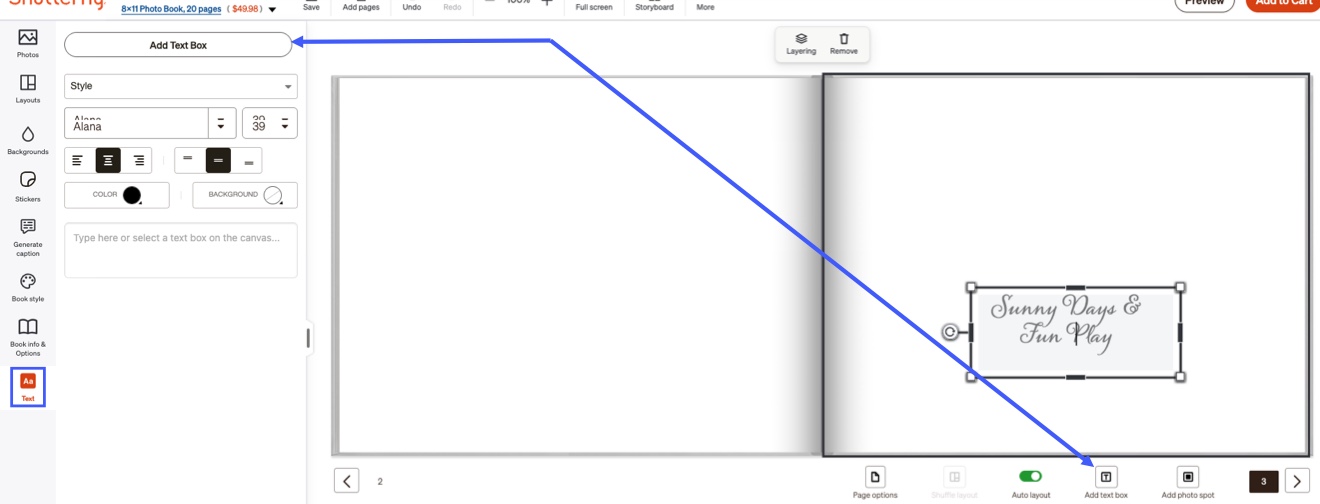
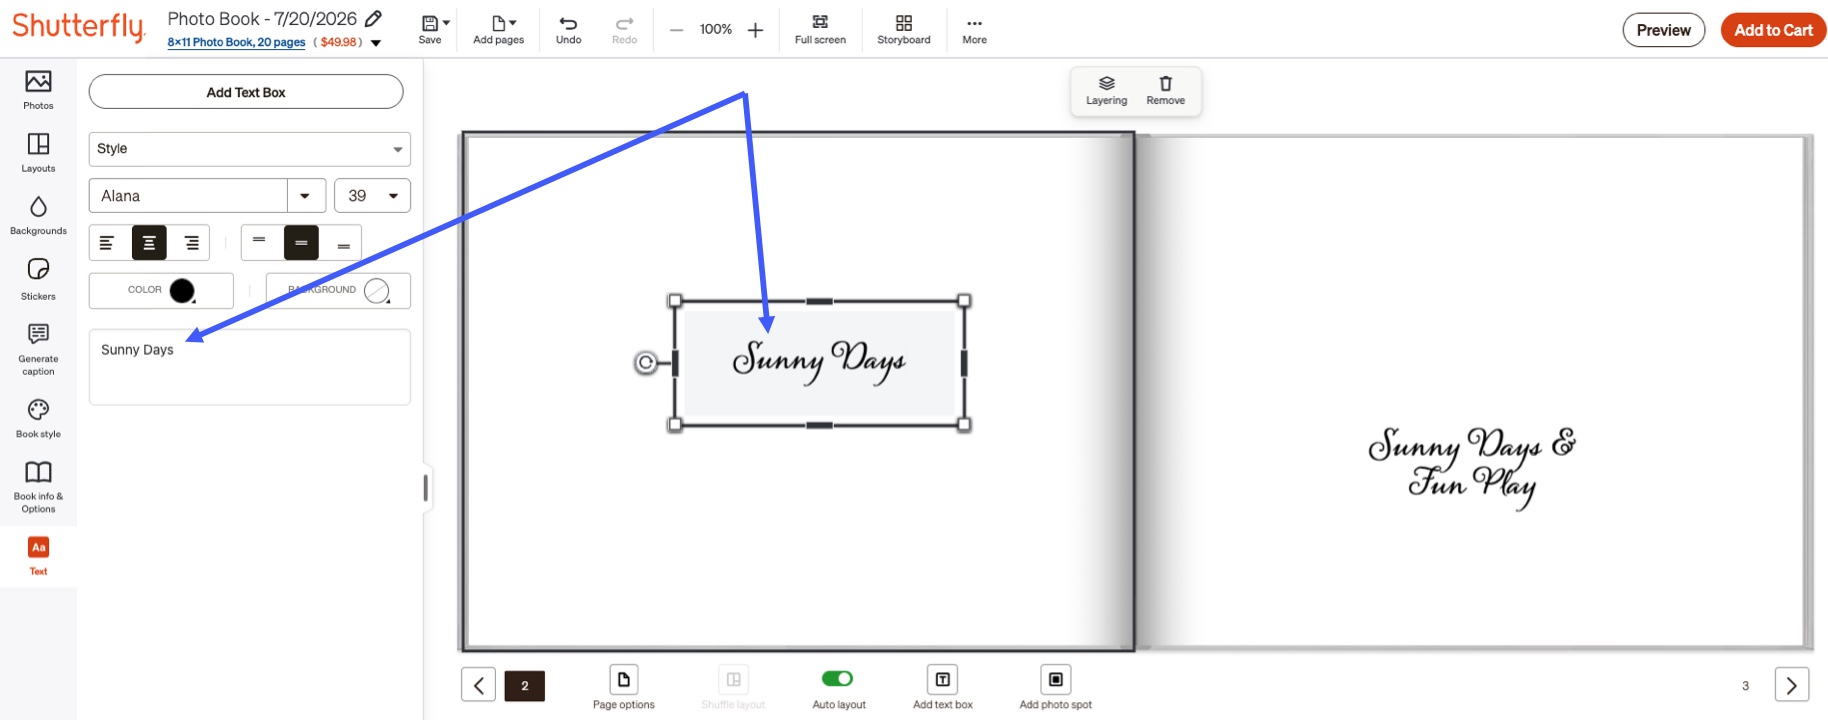
- Type the text either in the text box on the page or in the box to the left of the Photo Book.
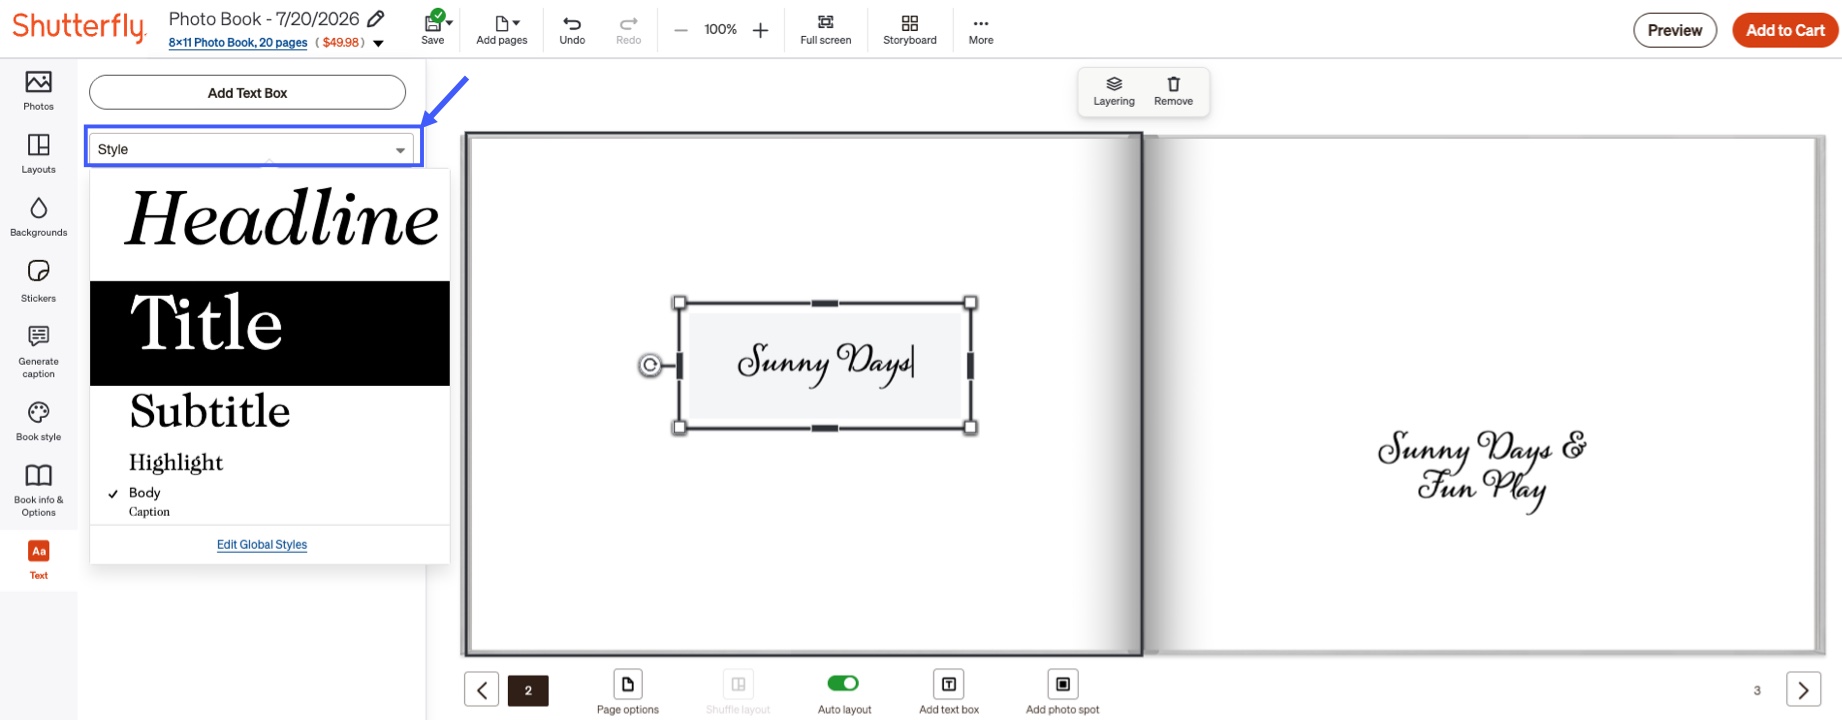
- Edit the Style, if desired.
- Updating the Style can update all fonts in the book at the same time based on the selected font.
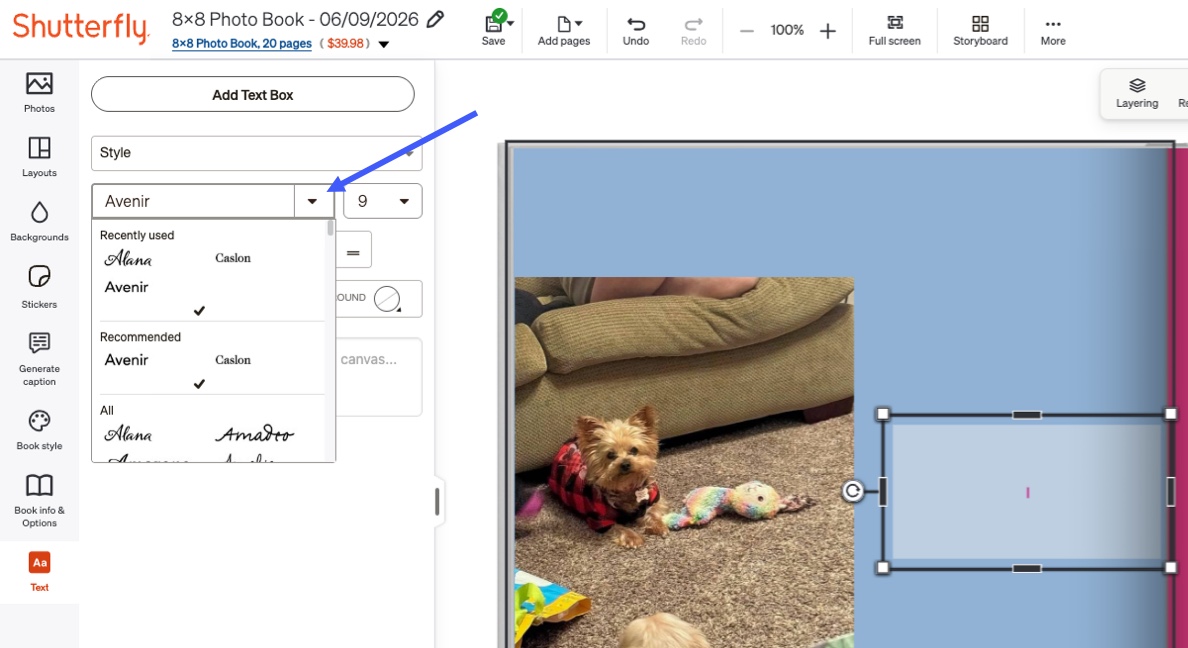
- Edit the font style, if desired.
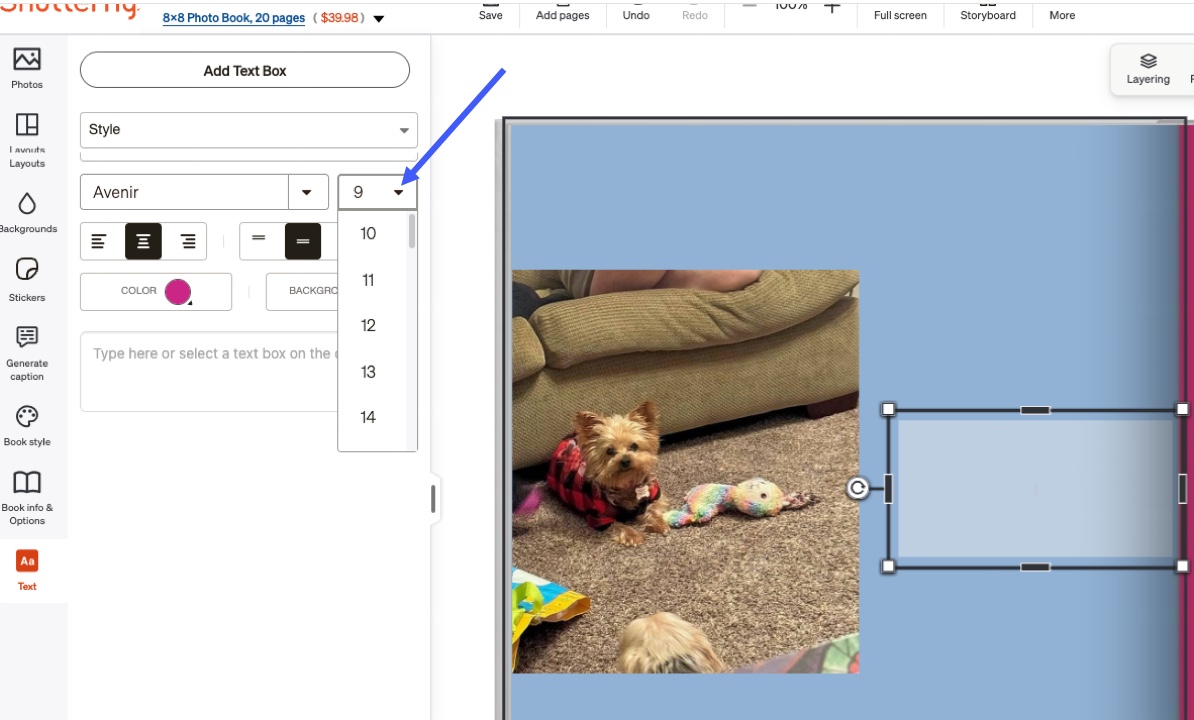
- Change the size of the font, if desired.
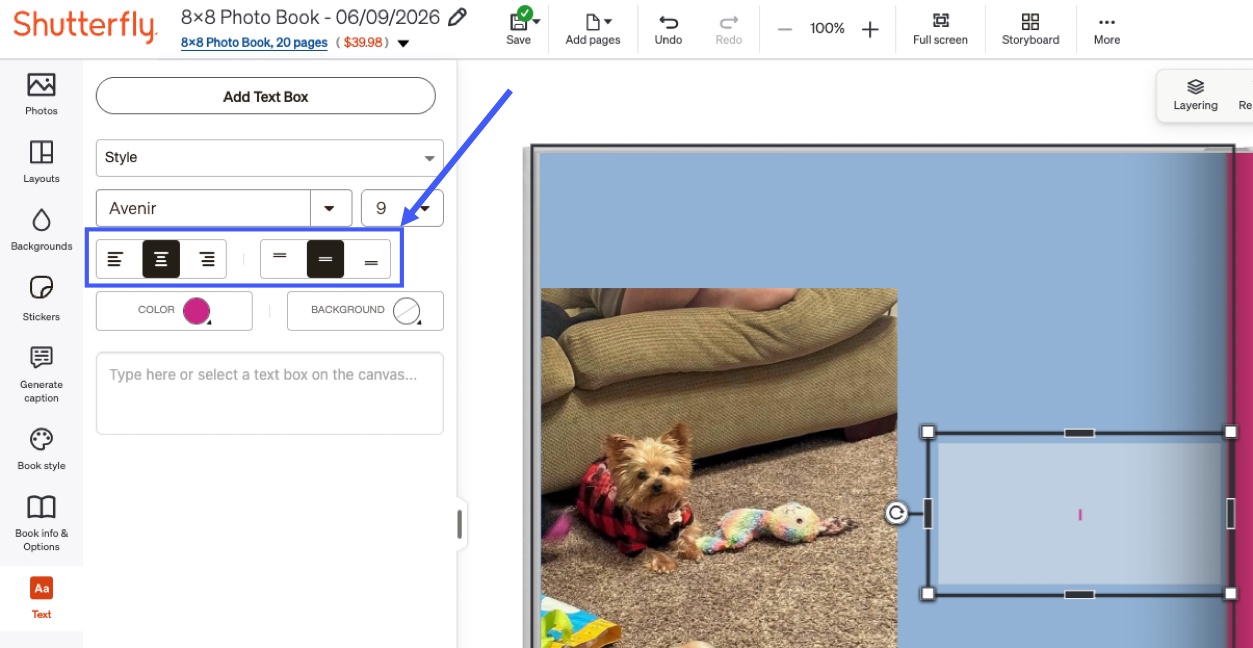
- Change the alignment of the text, if desired.
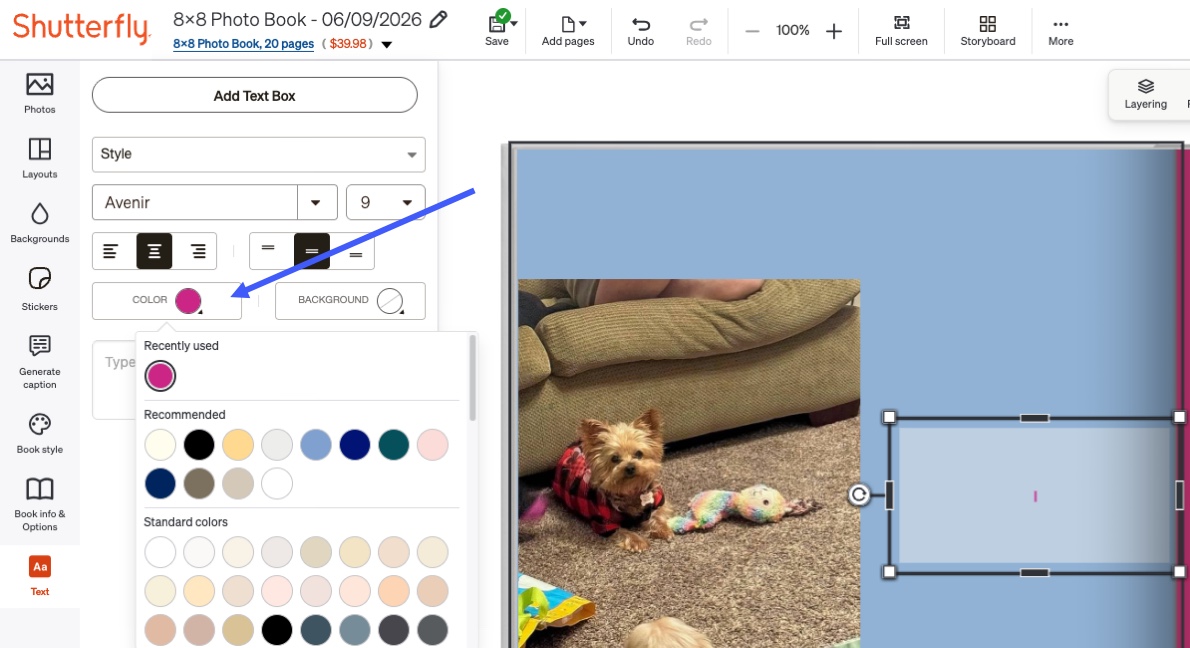
- Change the font color, if desired.
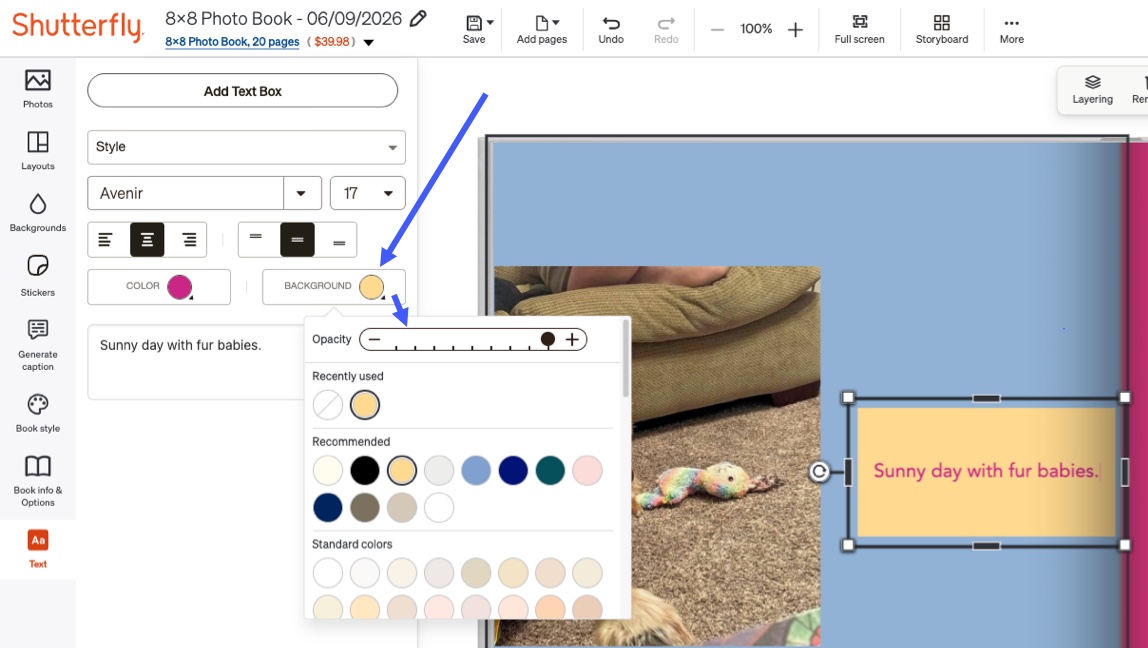
- Change the text background color and opacity, if desired.
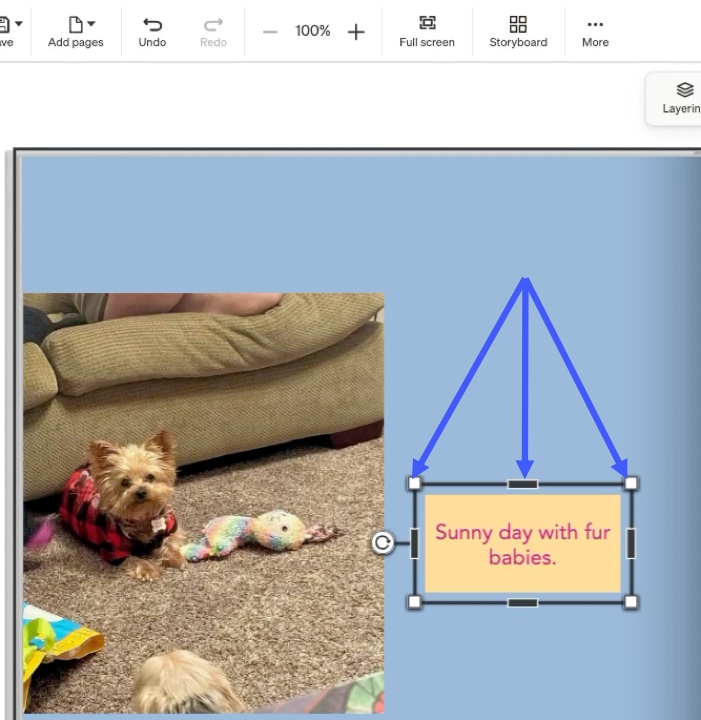
- Use the square boxes or the black lines surrounding the text box to drag and resize the text box.
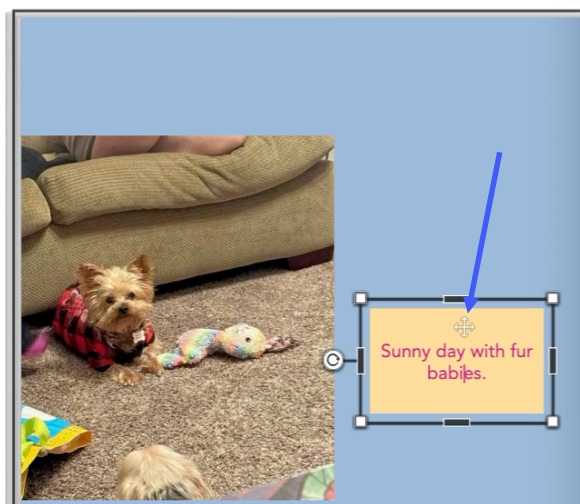
- Hover over the text box and Use the reposition icon to drag the text box to the desired location.
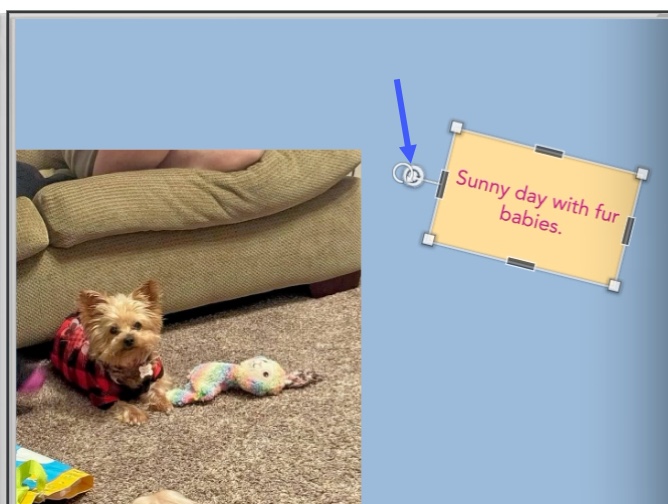
- Use the rotation handle located to the left of the text box to drag an image to the desired tilt.
Editing Text
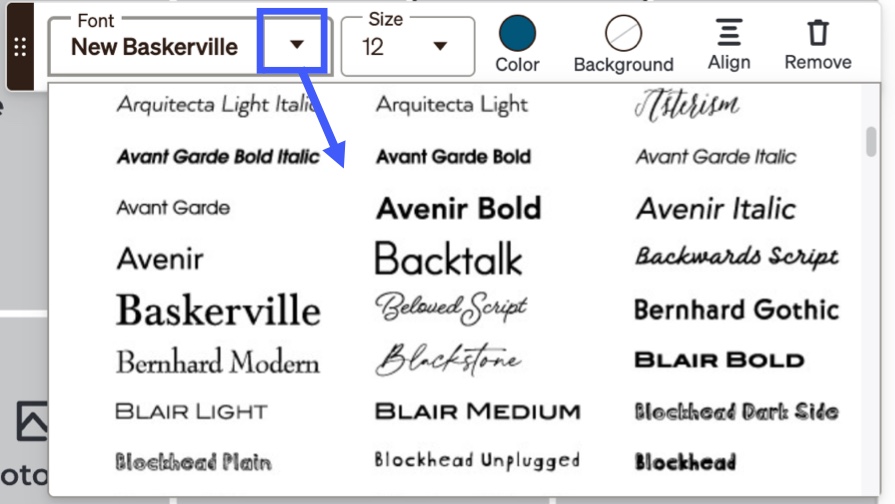
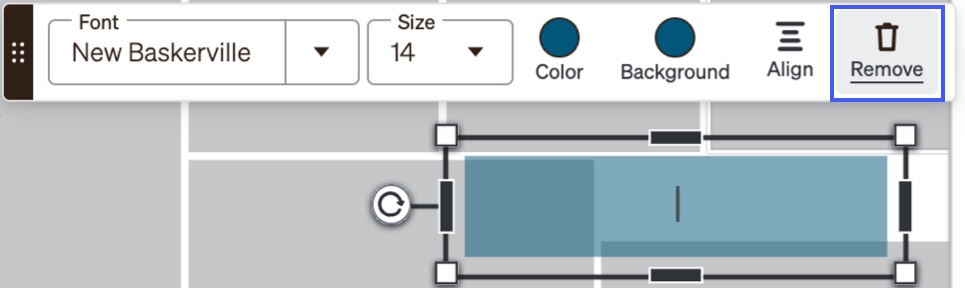
- Font
- Select the desired font style.
- Recently used fonts may be displayed first. Scroll to see all fonts.
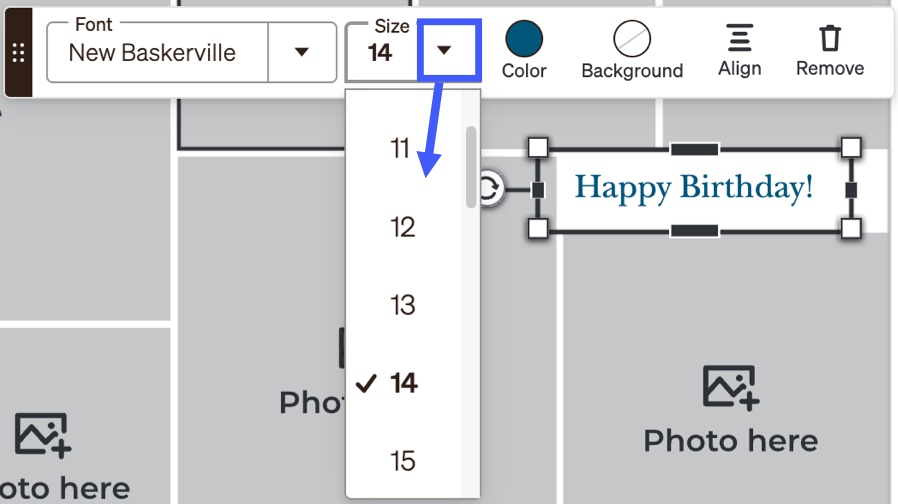
- Size
- Select the desired font size.
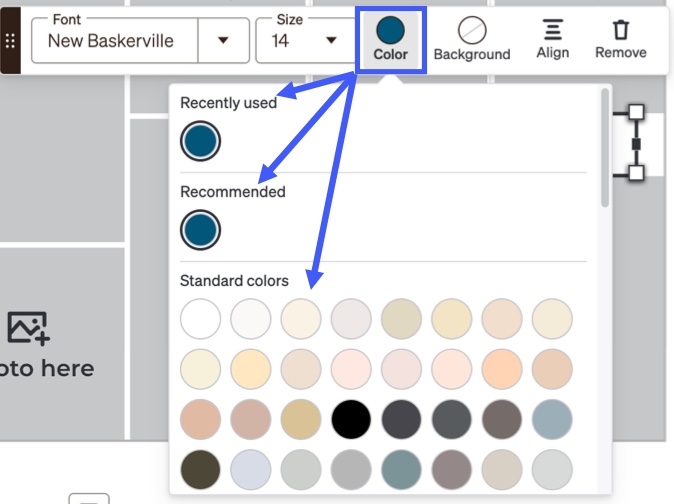
- Color
- Select the desired font color of the font.
- Recently used and Recommended colors will be displayed first, followed by Standard Colors.
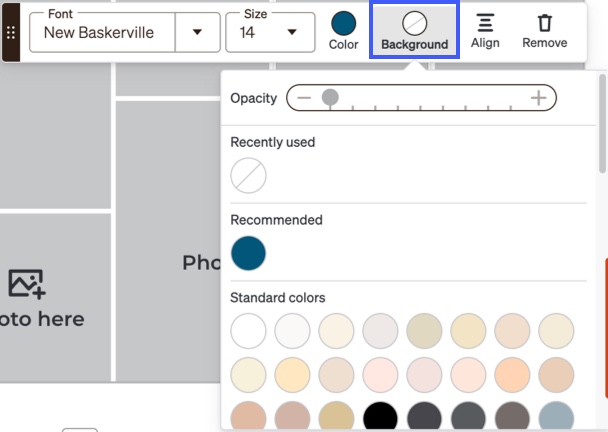
- Background
- Select a background color for the text only, if desired.
- The Opacity can be changed by click on the - or + signs.
- Recently Used and Recommended will be displayed first, followed by the Standard Colors.
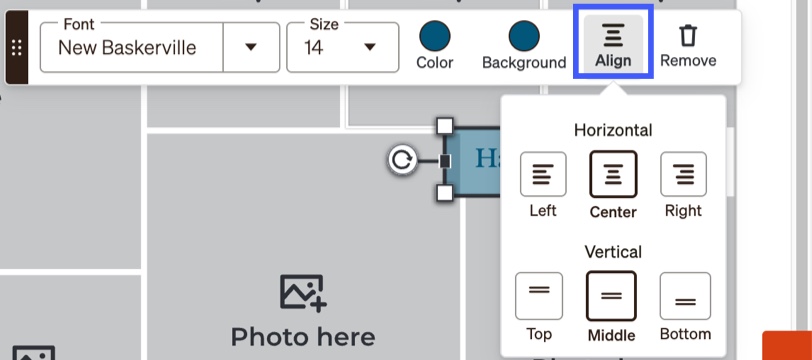
- Align
- Change Horizontal or Vertical Alignment to Left, Center, or Right alignment.
- Remove
- Click to remove a text box from the project.
Adding a Text Box
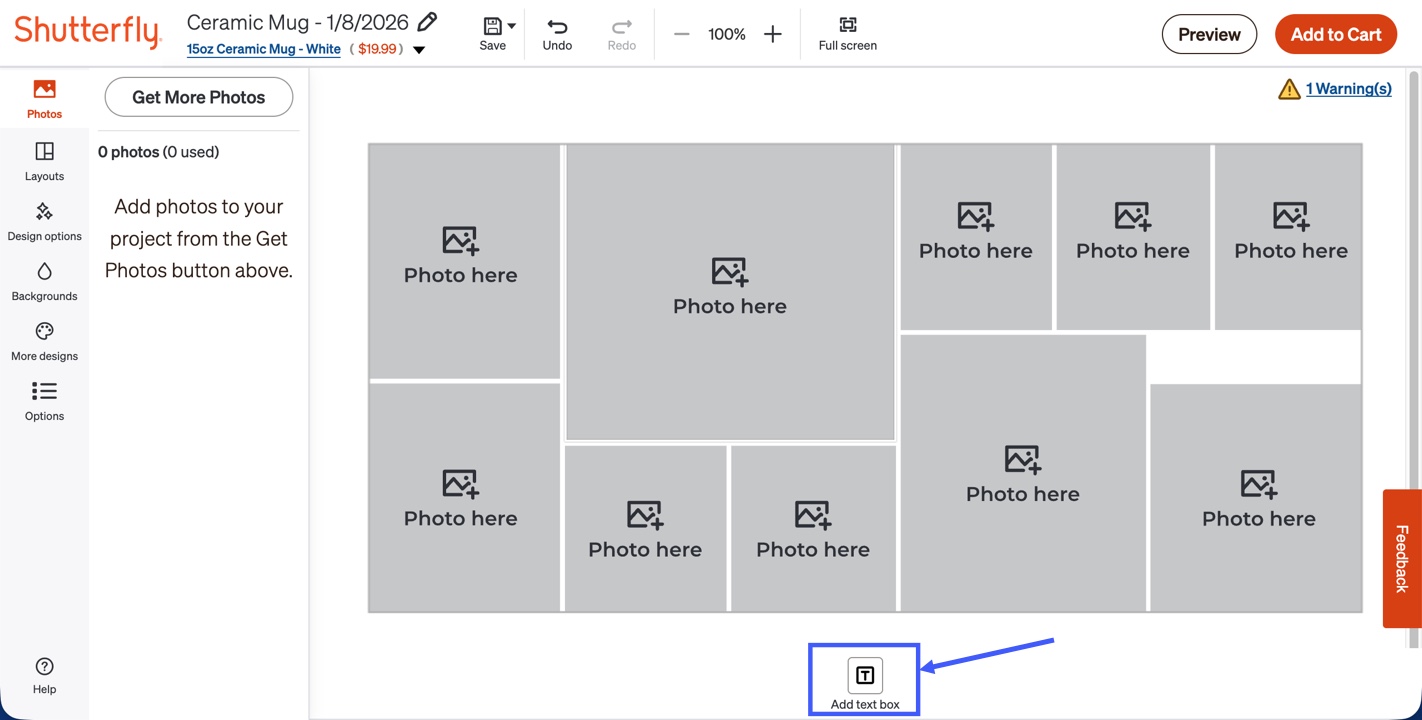
- Click 'Add Text Box' within a project to add the text box for editing.
- To edit a text box that has already been placed double-click on the text box and begin typing.
Spell Check
- Shutterfly offers a built-in spell check feature within the project.
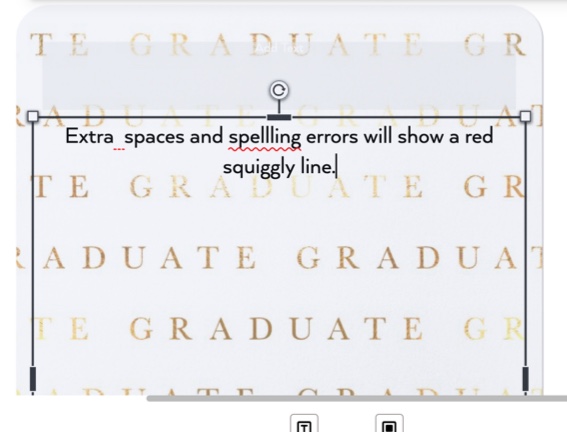
- Misspelled words are identified with a red squiggly line underneath the text.
- Extra spaces left within a project are also detected.
- Shutterfly isn't responsible for spelling errors in customer projects.
- All text should be reviewed carefully before placing an order.
Text Error
- If a red warning sign is displayed, there's an issue with the text that requires adjustments.
- The issue with the text as well as how to fix it will also be displayed.
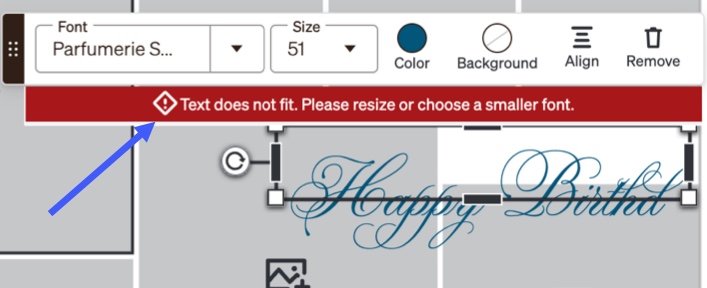
- Resolving 'Text does not fit. Please resize or choose a smaller font' error:
- Resize the text box to make it larger if this is an option.
- Change the font size to a smaller size.
- Change the font style to a smaller style font.
- Once the issue has been resolved, the warning sign will disappear.
- Always preview the project before ordering.
Related Articles


